


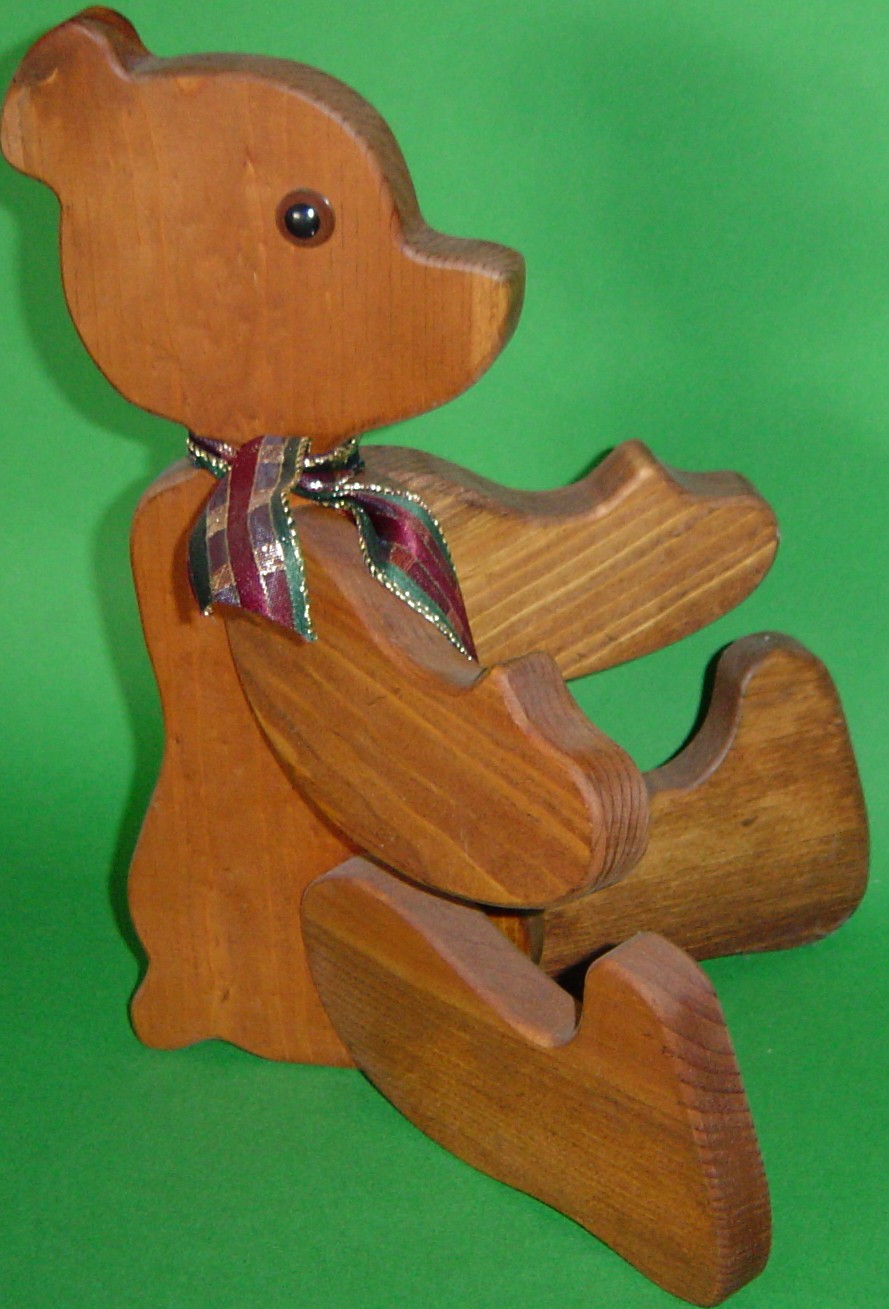
A simple little potted plant holder/accent. We gave these away as Christmas presents, though they have amazing versatility as a gift for just about any seasonal holiday. Change the ribbon around the neck to match the holiday theme. Red ribbon with hearts for Valentine's day, green with shamrocks for St. Patrick's day, etc. The classic lines of this old fashioned teddy bear make it look like an heirloom which has been passed down from prior generations. My dad and I worked together to develop the pattern, and build the prototype bear. Caroline provided the final artistic approval. It was a great father - son project.
Construction
Tools:
- Scroll saw
- Sander
- Orbital
- Disk
- Router
- 1/8th inch round over bit
- Router table
- Spindle sander
- Drill
We used wood which was on hand. There was a predominance of 1x... pine stock laying about, so that was our wood of choice. Any wood would work well with this project. I am pleased with our luck in selecting pine. It is easy to work with, and relatively inexpensive if you have to purchase it.
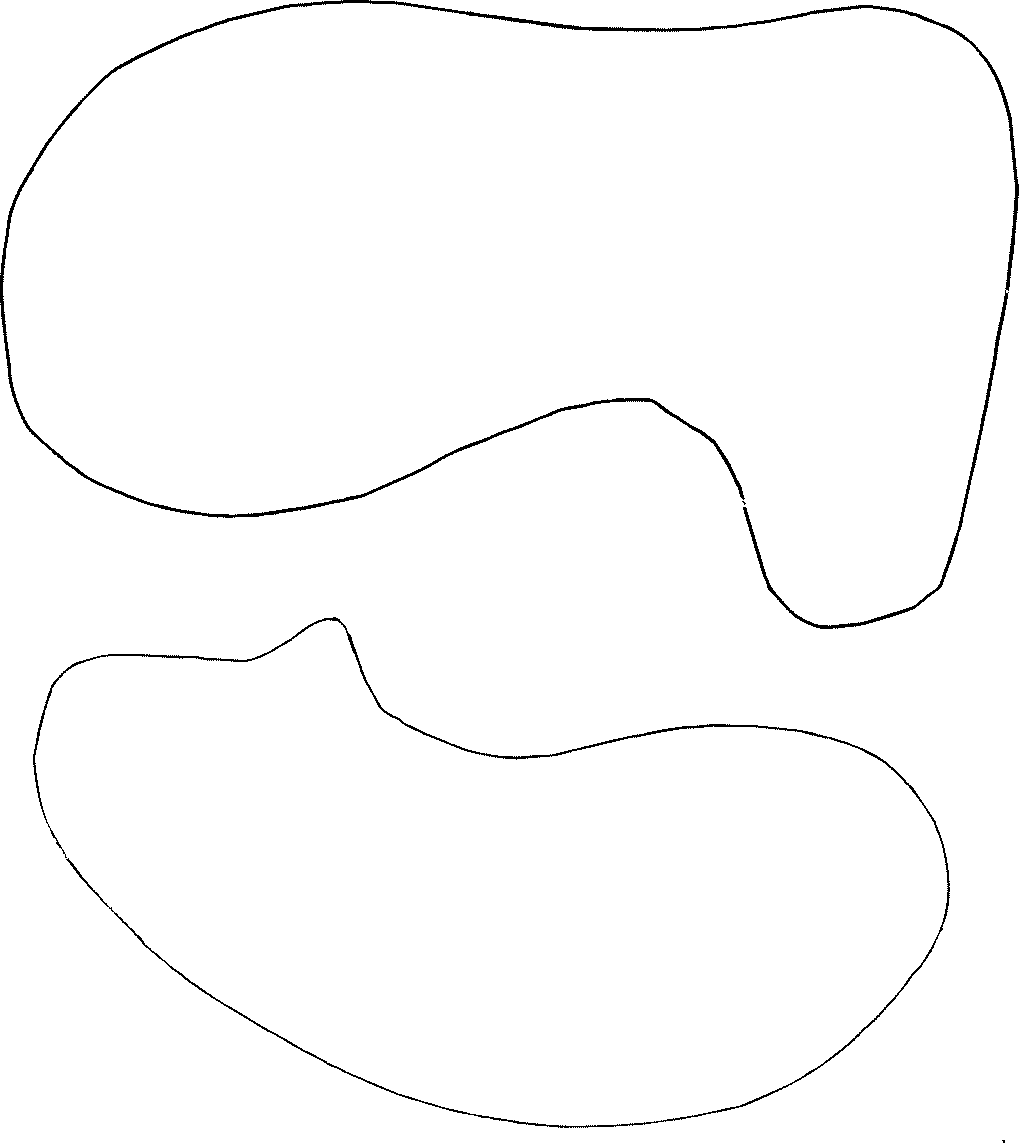
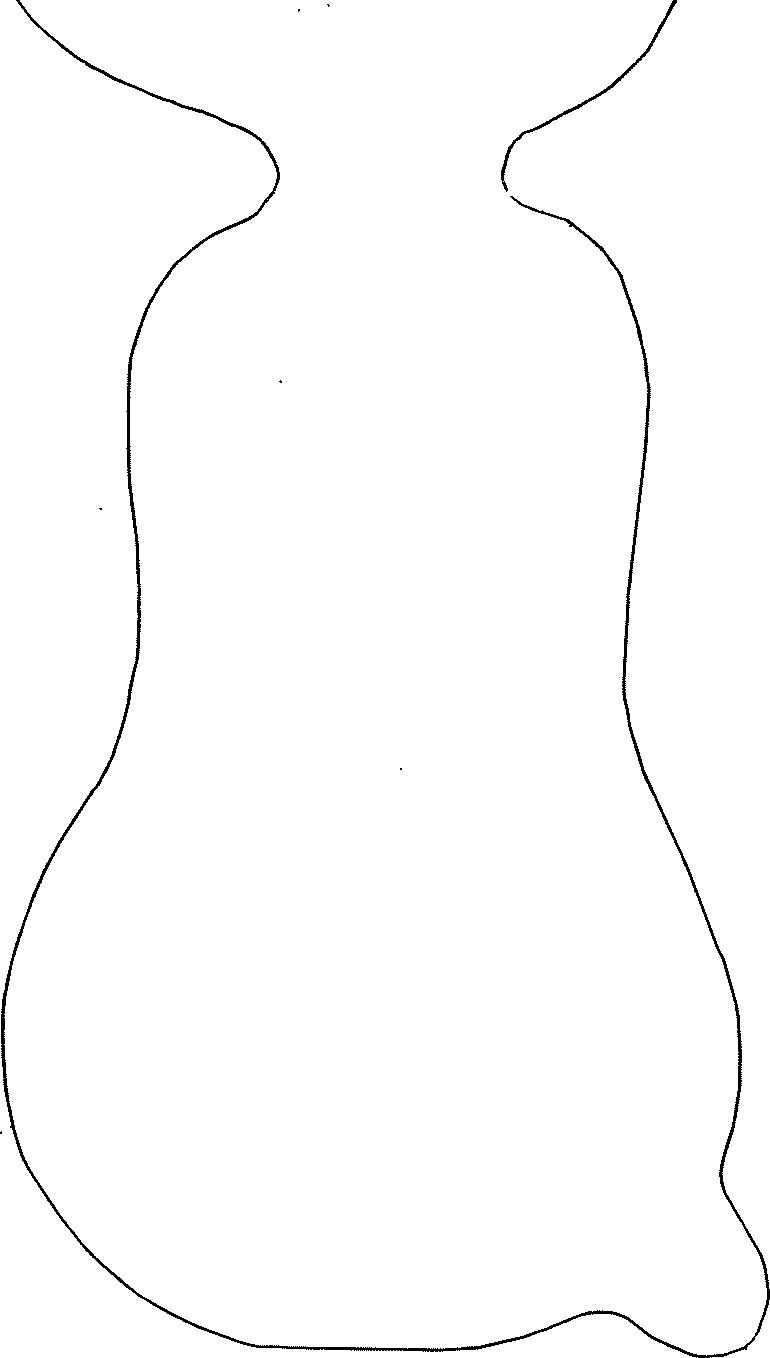
Making the pattern was the first step. You can see it by clicking here. You are welcome to save the image and print it our for your own use. It is up to you to figure out your software to scale the drawing to the desired size. Once the pattern had been finalized on chipboard stock, we traced it onto the pine and went at it with a scroll saw.
The parts were sanded (surface with an orbital sander, and edge with the spindle sander). The routing operation was next. All the edges were rounded over with a 1/8th inch round over bit chucked into a router mounted on a router table. The router table is pretty much essential for safety. It would be quite dangerous to try freehand routing of these small pieces. The carbide bit left a nice surface which required only minimal touch up sanding.
We used a practical method rather than the scientific method for determining the angle of the arms and legs. We wanted the bear to be able to hold a 6 1/4 inch diameter pot. So we stuck a pot between the legs and marked the angle on a piece of cardboard. We made certain that the angle was correct and equal on each side of the body. Then we built a little jig to duplicate the angle using a disk sander. We ran the arms and legs through the sander taking off enough stock to provide a solid gluing surface, and pleasing appearance.
Time for some glue. TiteBond II was our glue of choice. Easy to work with, sets up pretty fast, water cleanup, waterproof when cured. It creates a nice strong joint to boot. Since it sets up so fast, we decided to forego a clamping jig, and just held the glued pieces in place until the glue could hold on its own (5 - 10 minutes for each gluing operation.). It sounds like a long time, but it actually goes pretty fast when you are having a good time with your dad.
WATCO Danish Wood Oil was the finish we selected. They didn't have a shade we wanted, so we mixed Fruitwood and Walnut to make the shade we were after. Follow the directions on the can for application, and re-application.
With the finish applied, it was time to drill an eye hole. I found bear eyes at Beverly's Fabric store in Salinas. I seriously considered the idea of using plain buttons for the eyes, but those bear eyes looked pretty darn good. I still think the button eyes would provide a true old fashioned teddy bear look. Give it a shot if you can't find the bear eyes & let me know how it turns out. As far a locating the bear eyes, we took a guess at a pleasing location and got lucky. With the holes drilled, we cut a portion of the post off the eye, then glued the eye in place with a dab of TiteBond II.
Tie a ribbon around the bear's neck, and select a plant.
The pattern.
Click on the image to view. Scale them to whatever size you desire & have fun building. The full size bear body wouldn't fit on my flatbed scanner, so the body is shown here in two separate images.